Thursday, August 9, 2018

Preping- painting jenn's 1984 xl200 miscel parts

update...8/9/2018


Am getting a lot of the parts cleaned - de-rusted (CLR & Vinegar baths) and painted up.

other than sitting around watching paint dry it's not much of a chore so long as you don't spray to heavy and get things to running.


 Jenn wants to get rid of all of the RED ... which won't go with her theme... i took the suspension apart...
After cleaning - de greasing the coil suspension - i tried cleaning up the rust off the chrome parts - then 2 coats of white primer - 3 coats of Artic white on spring- 3 coats clear coat - painted armatures 3 coats gloss black --


It bturned out ok for an amateur i guess.


Cleaned, preped -de-rusted - & painted up many other parts also

The sprocket in the cardboard 'paint booth' will be etched - painted - and hydro-dipped in jenn's Lace film...
 The T-shirt the parts are laying on is VERY close to the color of the 1957 CHEVY Surf Green she choose. .

 The supervisor is checking quality control -- she brought us a beer so it must be passing inspection.

The frame is being worked on in a downtown shop ( yoke needs new bearings) but I've got the engine out and prepping for a HIGH TEMP gloss Black & may high lite the 1/8 inch FINS in green or white.

Had to wrap up a couple internal to external wires I didn't want to take any covers off with no back up 1984 gaskets) and plug up the carb intake with several baggies and rubber bands -- also installed the muffler Header to plug up the exhaust so nothing (water) got in while cleaning/power washing /


 The 2 split header spacers I got with the original header/muffler/ I got for this bike were to long by  a 1/4 inch or so (or more likely the STUDS attached to bike were to short) so the outside mounting collar would not seat on the studs / nor allow for the nuts to be screwed on --- i took care of the problem by using a metal cutting blade to cut off a NUT WIDTH off of the spacers - and it fit perfect.


and that's where i am at right now ... am working at it slowly

Jenns hydro- prints are here"  guns n roses n lace


we'll be doing the sprocket in the lace.... probable do the gas cap lace too. Figure other parts as we go.
the side panels for sure at this point will be chevy green dipped in guns and roses...


dang there are parts everywhere... this ain't 1/4 of it ... have an entire table alone with electronic- wires - tools -  stuff all over the floor ... 2 missing engine paint cans -- i need to re-organize


anyone seen the tires? they're here somewhere ... all greased up with new bearings and brakes... this thing will work out fine - if i can remember how to put it together.... finding bolt TORQUE values without a manual has been a load of fun too.


here's jenn's mama helping out with the engine paint job.....
***************


***********************************
8/11


 Several dents & dings to get out...


***************************
8/17
the dent removal tool kit i got totally failed to take out a single dent or ding.


I'll have to resort to bondo i guess.
*****************************************
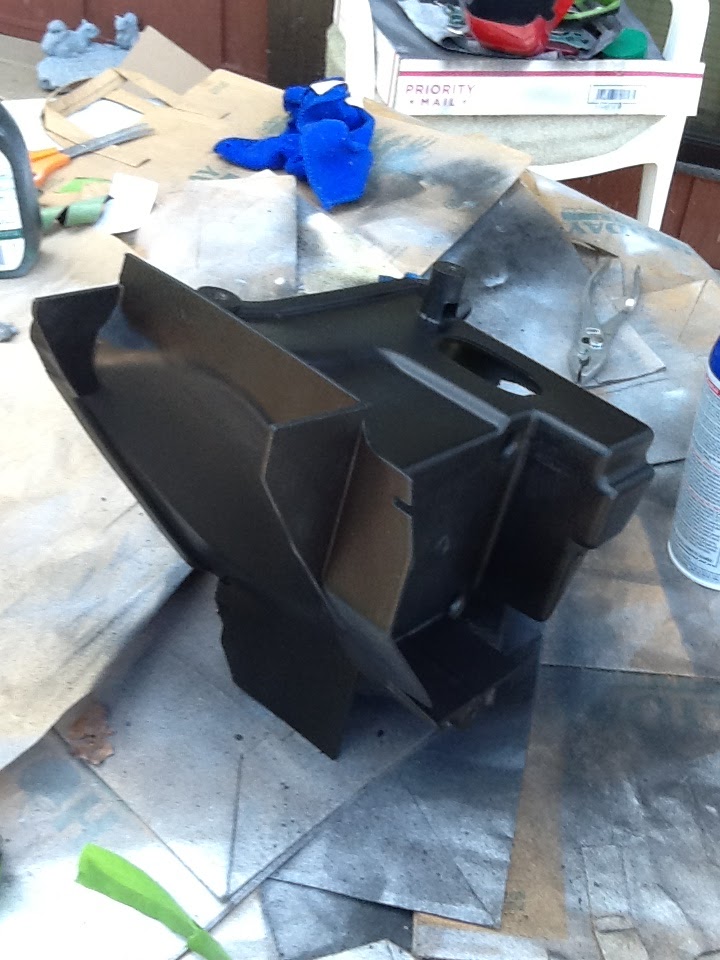
The butchers who owned this bike in past lives hacked it up (and although i Did buy a replacement air box - its not set up for the carb - and the engine isn't set up for the 'hose' breathing system as is)
So right now i'm stuck using the hacked up box... its beat up - a big hole cut in it (that i'll figure out how to put a flap across it) old - ugly - oxidized - and pretty much useless other than holding the battery.
I did clean it up and then i used a product called Perfomix Plasti-Dip to spray on a plastic coating. Made it look much like NEW.


 ***********************************************

8/15
the 1957 OEM Chevy Surf Green is here ( I'll add where i ordered it later)

************
8/15
Cleaning up the lower forks has been quite a project -- Simple Green didnt remove 30 years of black oxidation.
Next i tried McGuires Rubbing compound & buffing wheel on drill -- that took some off.
Then something called Bkue metal cleaner w/ 1500 sandpaper...  did a lil better
Then i used Mother's Aluminum Mag cleaner/ polish - FINALLY! THAT worked really well- stuff was coming off using just my hand! Using the buffing wheel with Mother's started doing the clean & shine finally.
 This has been cleaned several times ---It took MOTHER's Aluminum Mag Cleaner/polish/ before it finally began to remove ages of crud.

The top lower fork after clean up... (the bottom fork not started yet other than simple green...)
It IS hard to see- but it IS beginning to shine up.
I can tell you using wet sanding took crao off but left a LOT of scratches to buff out.
So probably not a good solution.
SOS n simple green actually did a finalized good job before buffing - but i don't know if that because of all the otherb bs i did...


Wednesday, July 25, 2018

1984 xl200 speedometer upgrade to an original / Wheel bearings & Brake work

Well, the speedometer on this bike read only in kilometers...

I'm all for some good foreign beers especially when ya have to dig out n read all this metric tools crap - but i draw a line at having to try to convert in my head at 60 mph how dam fast the cop is going to say the kiddo was going.
So, whether this speedo is an actual fur-in 1984 original i can't say because when i turned it over Steve, at GP Racing (on Nevada St, Auburn Ca.) pointed out the mounting bolts had flat bar extensions to enable the bolts to line up to an original mounting bracket...just another day in a life of a modifiers garage i guess.  (click on pics to ZOOM)

The new speedometer addition did come off an original 1984 - fits perfect
and reads MPH... need me a hat -- 'makin' America MPH Again..."

It is bigger than the fur-in one - but that will be easier to read MPH anyway.
in addition it also has in fine print the kilometer per hour reading on the gauge for your squintin' furin exchange student buddies.... (btw, never lend your bike out anyway - I lost a 1949 panhead to a crash n burn that way 40 years ago)


The only problem i see at this point is on the left side there is a turn/knob/ type indicator that appears to be partly broken that zero's out the odometer. i can zero it with needle nose - but i will need to figure out how to extend a functioning knob to zero it via 2 fingers... pulling out needle noose from a pocket at the gas station just doesn't seem like.... I fixed your bike!! have fun guessing when u need your next fill up!.. (fill up- at 160 miles to be on the safe side of 175 max miles to the 2.5 gallon tank)

***********************************************

7/26

Pulled rear tire

makes it easier to clean -
but i also bought new brakes for front and back.
Couldn't break 19mm nut loose even with breaker bars  - so i had to get out compressor and fortunately i have a a zap gun - i mean an impact wrench
...it  took nut right off at 100 psi-


Pretty strange, for this bike, but when i pulled the brake hub out of rim section and measured the pad on them the meat was exact inch/mm/ match as the new ones... so i guess I'll leave 'em on and hold on to new ones til they need changing. (Haven't got to front brakes yet)


 ********************************
7/27
So i saw a video that says wheel bearings should be changed every 2-3 years - depending on your use and weather (mud-rain -dust- amount of use of).
I've got to believe that the owner/s of this bike probably never fixed a thing on it...
The video showed when bike is jacked up you grab the top n bottom of the tire from a side position,  and try to move it back and forth -- if it wobbles - it's past time to change the bearings.
I already had the back tire off - so didn't perform this check - but experiencing the condition of everything else on it I'd bet a 30 pak they haven't been changed in YEARS - so I'm investing the 15 bucks front n back (each) and removing the bearings and replacing them.
Images from places selling them were confusing, and i didn't trust I'd get the correct sets- so
I ordered them from GP Racing on Nevada ST, Auburn- and the owner, Steve, said, when the order comes in to just bring the tires in and he'd show me HOW TO install them. (I can't recommend this owner, and this bike shop more!!!  He usually has several dirt bikes for sale on display too) So,rather than videos to follow,   i'll get some on the job, bearings, training-- further ensuring my kid gets on safe-stable wheels!

The only down side is... i won't be getting a new tool to take the bearing out :) :) Maybe I'll try MAKING the DIY tool i saw several people construct for re seating the bearings...

...did someone say Beertime??
*****************************************


7/26
bunch of pics of inside of gas tank - they didn't turn out - too dark couldn't see inside
but it is packed with rust....  gonna try one more idea to get a couple pics of the inside of tank before it gets a vinegar bath...
https://restoringdirtbikes.blogspot.com/2018/07/1984-honda-xl200r-tank-removal-tip.html

********************
8/9/ 2018 update

took the front forks and frame into GP Racing, on Nevada Street, in Auburn, to be elvaluated last Thursday.
As I suspected their operation wasn't up to par.
Althought forks were not leaking - they had waaaaaaaay to much push play in them- Steve, the owner, said it was almost as if someone didn't put oil in them...  i wouldn't bet against it.
so i'm havening the forks serviced - I've never done it and I'm not putting my kid on anything IFY.
The steering yoke made noise and seemed rough when turned from side to side.
So am having new race-bearing -seals installed also.
I don't have the right size tools to do it - much as i love getting a new tool - butt some things i'm not going to experiment with at 65 miles per hour... not when my kid is the test pilot...

when i get the frame back i'll be cleaning sanding priming painting and clear coating it to a black sheen ...
The OEM 1957 chevy surf green isn't here yet - took them10 days til they bothered to ship it -- and that was a day after i complained that they hadn't notified me yet of a shipment.

The 2 hydro-prints jenn ordered are here tho - guns 100 dollar bill roses n lace

chevy green - black and white ... should be interesting soon.
*******************************

............